


最新下载


热门教程
- 1
- 2
- 3
- 4
- 5
- 6
- 7
- 8
- 9
- 10
JavaScript实现更换头像功能代码示例
时间:2021-08-13 编辑:袖梨 来源:一聚教程网
本篇文章小编给大家分享一下JavaScript实现更换头像功能代码示例,文章代码介绍的很详细,小编觉得挺不错的,现在分享给大家供大家参考,有需要的小伙伴们可以来看看。
最主要的是使用jquery的插件 cropper
1、基本使用步骤
1.在
中导入 cropper.css 样式表:2.在
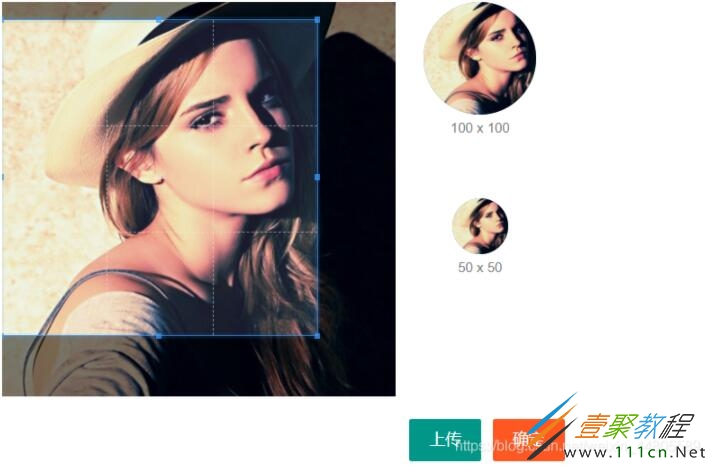
的结束标签之前,按顺序导入如下的 js 脚本:3.定义如下的 HTML 结构:

100 x 100
50 x 50
4.样式CSS:
/* 设置卡片主体区域的宽度 */

.layui-card-body {

}


/* 设置按钮行的样式 */

.row2 {
    display: flex;
    justify-content: flex-end;
    margin-top: 20px;
}


/* 设置裁剪区域的样式 */

.cropper-box {


    background-color: cyan;
    overflow: hidden;
}


/* 设置第一个预览区域的样式 */

.w100 {


    background-color: gray;
}


/* 设置第二个预览区域的样式 */

.w50 {


    background-color: gray;
    margin-top: 50px;
}


/* 设置预览区域下方文本的样式 */

.size {
    font-size: 12px;
    color: gray;
    text-align: center;
}


/* 设置图片行的样式 */

.row1 {
    display: flex;
}


/* 设置 preview-box 区域的的样式 */

.preview-box {
    display: flex;
    flex-direction: column;
    flex: 1;
    align-items: center;
}


/* 设置 img-preview 区域的样式 */

.img-preview {
    overflow: hidden;
    border-radius: 50%;
}
5.导入自己的jS文件,并写以下内容,实现基本剪裁效果:
$(function() {
    // 1.1 获取裁剪区域的 DOM 元素
    var $image = $('#image');
    // 1.2 配置选项
    const options = {
        // 纵横比
        aspectRatio: 1,
        // 指定预览区域
        preview: '.img-preview'
    };

    // 1.3 创建裁剪区域
    $image.cropper(options);
})
做完以上准备工作,可以实现如下效果
2、更换裁剪的图片
1.添加上传文件的输入框,注意要把输入框隐藏起来:
2.为文件选择框绑定change事件
// 为文件选择框绑定 change事件
// 只要选择的文件发生变化就会触发change事件
$('#file').on('change', function(e) {
        // 获取用户选择的文件
        var filelist = e.target.files;
        if (filelist.length === 0) {
            return layer.msg('请选择照片!');
        }
        // 1.拿到用户选择的文件
        var file = e.target.files[0];
        // 2.将文件,转化为路径
        var imgURL = URL.createObjectURL(file);
        // 3.重新初始化剪裁区域
        $image
            .cropper('destroy') // 销毁旧的裁剪区域
            .attr('src', imgURL) // 重新设置图片路径
            .cropper(options) // 重新初始化裁剪区域
})
3.为确定按钮绑定点击事件
// 为确定按钮,绑定点击事件
$('#btnUpload').on('click', function() {
 // 1.要拿到用户剪裁之后的头像
        var dataURL = $image
            .cropper('getCroppedCanvas', { // 创建一个 Canvas 画布
                width: 100,
                height: 100
            })
            .toDataURL('image/png') // 将 Canvas 画布上的内容,转化为 base64 格式的字符串

        // 2.调用接口,把头像上传到服务器
        $.ajax({
            method: 'POST',
            url: '/my/update/avatar',
            data: {
                avatar: dataURL
            },
            success: function(res) {
                if (res.status !== 0) {
                    return layer.msg('更换头像不成功!');
                }
                layer.msg('更换头像成功!');
                window.parent.getUserInfo();
            }
 })
相关文章
- SpringBoot测试配置属性与web启动环境解析 10-24
- SpringBoot常用计量与bean属性校验和进制数据转换规则解析 10-24
- 工厂方法在Spring框架中的运用介绍 10-24
- SpringBoot热部署设置详解 10-24
- JavaScript二叉搜索树构建操作解析 10-12
- JavaScript二叉树及各种遍历算法讲解 10-12