


最新下载


热门教程
- 1
- 2
- 3
- 4
- 5
- 6
- 7
- 8
- 9
- 10
Python使用Keras OCR实现从图像中删除文本代码示例
时间:2022-03-28 编辑:袖梨 来源:一聚教程网
本篇文章小编给大家分享一下Python使用Keras OCR实现从图像中删除文本代码示例,文章代码介绍的很详细,小编觉得挺不错的,现在分享给大家供大家参考,有需要的小伙伴们可以来看看。
处理
为了从图像中删除文本,我们将执行以下三个步骤:
1.识别图像中的文本,并使用KerasOCR获取每个文本的边界框坐标。
2.对于每个边界框,应用一个遮罩来告诉算法我们应该修复图像的哪个部分。
3.最后,应用一种修复算法对图像的遮罩区域进行修复,从而得到一个无文本图像。

实现
Keras ocr简介
KerasOCR提供现成的ocr模型和端到端训练管道,以构建新的ocr模型(请参见:https://keras-ocr.readthedocs.io/en/latest/).
在这种情况下,我们将使用预训练的模型,它对我们的任务非常有效。
KerasOCR将自动下载探测器和识别器的预训练权重。
当通过Keras orc传递图像时,它将返回一个(word,box)元组,其中框包含四个角的坐标(x,y)。
下面是一个快速示例:
import matplotlib.pyplot as plt
import keras_ocr

pipeline = keras_ocr.pipeline.Pipeline()

#read image from the an image path (a jpg/png file or an image url)
img = keras_ocr.tools.read(image_path)

# Prediction_groups is a list of (word, box) tuples
prediction_groups = pipeline.recognize([img])

#print image with annotation and boxes
keras_ocr.tools.drawAnnotations(image=img, predictions=prediction_groups[0])
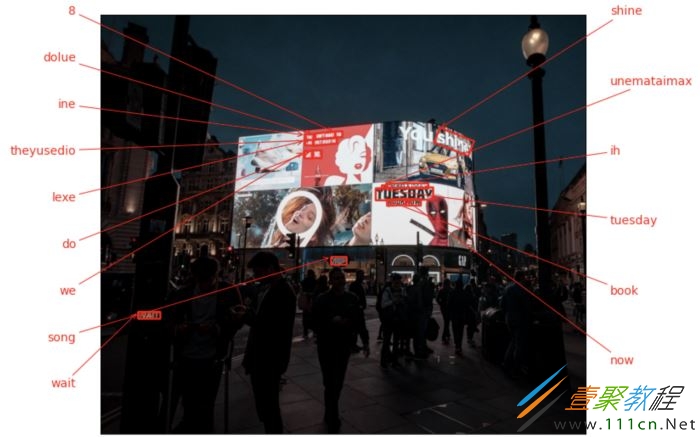
如果我们看一下prediction_groups,我们会看到每个元素对应一组坐标。
例如,prediction_groups[0][10]如下:
('tuesday',
 array([[ 986.2778 ,  625.07764],
        [1192.3856 ,  622.7086 ],
        [1192.8888 ,  666.4836 ],
        [ 986.78094,  668.8526 ]], dtype=float32))
数组的第一个元素对应左上角的坐标,第二个元素对应右下角,第三个元素是右上角,而第四个元素是左下角。

cv2修复函数
使用OpenCV应用修复算法时,需要提供两幅图像:
输入图像,包含我们要删除的文本。
遮罩图像,它显示图像中要删除的文本在哪里。第二个图像的尺寸应与输入的尺寸相同。
Cv2具有两种修复算法,并允许应用矩形、圆形或线遮罩(请参考)
在这种情况下,我决定使用线遮罩,因为它们更灵活地覆盖不同方向的文本(矩形遮罩只适用于平行或垂直于x轴的单词,圆形遮罩将覆盖比较大的区域)。
为了应用遮罩,我们需要提供线的起点和终点坐标以及线的厚度:
起点将是框的左上角和左下角之间的中点,终点将是右上角和右下角之间的中点。
对于厚度,我们将计算左上角和左下角之间的线长度。
import math
import numpy as np

def midpoint(x1, y1, x2, y2):
    x_mid = int((x1 + x2)/2)
    y_mid = int((y1 + y2)/2)
    return (x_mid, y_mid)

#example of a line mask for the word "Tuesday"
box = prediction_groups[0][10]
x0, y0 = box[1][0]
x1, y1 = box[1][1]
x2, y2 = box[1][2]
x3, y3 = box[1][3]
x_mid0, y_mid0 = midpoint(x1, y1, x2, y2)
x_mid1, y_mi1 = midpoint(x0, y0, x3, y3)
thickness = int(math.sqrt( (x2 - x1)**2 + (y2 - y1)**2 ))
现在我们可以创建我们的遮罩:
mask = np.zeros(img.shape[:2], dtype="uint8")
cv2.line(mask, (x_mid0, y_mid0), (x_mid1, y_mi1), 255, thickness)
我们还可以检查遮罩区域,确保其正常工作。
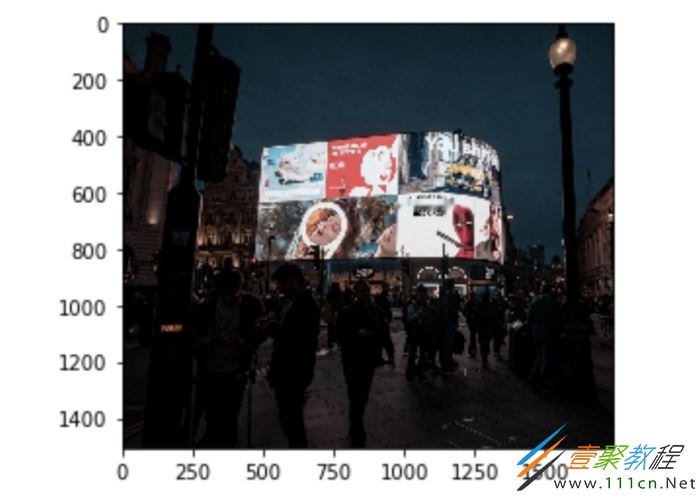
masked = cv2.bitwise_and(img, img, mask=mask)
plt.imshow(masked)

最后,我们可以修复图像。
在这种情况下,我们将使用cv2.INPAINT_NS,指得是“Navier-Stokes, Fluid Dynamics, and Image and Video Inpainting”一文中描述的修复算法。
img_inpainted = cv2.inpaint(img, mask, 7, cv2.INPAINT_NS)
plt.imshow(img_inpainted)
正如你所看到的,“Tuesday”已从图片中删除。
汇总
现在,让我们把它总结起来,创建一个函数来去除任何图像中的文本。
我们只需要生成框列表,并迭代每个文本框。
import matplotlib.pyplot as plt
import keras_ocr
import cv2
import math
import numpy as np

def midpoint(x1, y1, x2, y2):

    x_mid = int((x1 + x2)/2)
    y_mid = int((y1 + y2)/2)

    return (x_mid, y_mid)

pipeline = keras_ocr.pipeline.Pipeline()

def inpaint_text(img_path, pipeline):

    # read image
    img = keras_ocr.tools.read(img_path)

    # generate (word, box) tuples
    prediction_groups = pipeline.recognize([img])
    mask = np.zeros(img.shape[:2], dtype="uint8")

    for box in prediction_groups[0]:

        x0, y0 = box[1][0]
        x1, y1 = box[1][1]
        x2, y2 = box[1][2]
        x3, y3 = box[1][3]

        x_mid0, y_mid0 = midpoint(x1, y1, x2, y2)
        x_mid1, y_mi1 = midpoint(x0, y0, x3, y3)
        thickness = int(math.sqrt( (x2 - x1)**2 + (y2 - y1)**2 ))
        cv2.line(mask, (x_mid0, y_mid0), (x_mid1, y_mi1), 255, thickness)
        img = cv2.inpaint(img, mask, 7, cv2.INPAINT_NS)

    return(img)
以下是最终结果(之前和之后):

另外两个例子:


请注意,如果要保存图像,需要将其转换为RGB格式,否则颜色会反转!
img_rgb = cv2.cvtColor(img, cv2.COLOR_BGR2RGB)
cv2.imwrite(‘text_free_image.jpg',img_rgb)
如果你只对删除某些单词感兴趣,则可以包括一个if条件,如下所示:
给出了一个要删除的单词列表
remove_list = [‘tuesday', ‘monday']
我们可以在for循环中包含if条件
def inpaint_text(img_path, remove_list, pipeline):

    # read image
    img = keras_ocr.tools.read(img_path)

    # generate (word, box) tuples
    prediction_groups = pipeline.recognize([img])
    mask = np.zeros(img.shape[:2], dtype="uint8")

    for box in prediction_groups[0]:

        if box[0] in remove_list:
           x0, y0 = box[1][0]
           x1, y1 = box[1][1]
           x2, y2 = box[1][2]
           x3, y3 = box[1][3]

           x_mid0, y_mid0 = midpoint(x1, y1, x2, y2)

           x_mid1, y_mi1 = midpoint(x0, y0, x3, y3)

           thickness = int(math.sqrt( (x2 - x1)**2 + (y2 - y1)**2 ))

           cv2.line(mask, (x_mid0, y_mid0), (x_mid1, y_mi1), 255,
           thickness)

           img = cv2.inpaint(img, mask, 7, cv2.INPAINT_NS)

    return(img)
当然,这只是一个快速的例子,说明了如何对特定的单词列表进行修复。
相关文章
- Golang ProtoBuf的基本语法详解 10-20
- Python识别MySQL中的冗余索引解析 10-20
- Python+Pygame绘制小球代码展示 10-18
- Python中的数据精度问题介绍 10-18
- Python随机值生成的常用方法介绍 10-18
- python3解压缩.gz文件分析 09-27