


最新下载


热门教程
- 1
- 2
- 3
- 4
- 5
- 6
- 7
- 8
- 9
- 10
PHP用户注册登录功能完整实例
时间:2016-08-24 编辑:简简单单 来源:一聚教程网
验证码制作
一、实验简介
本次实验将会带领大家使用面向对象的思想封装一个验证码类。并在注册和登陆界面展示使用。通过本次实验的学习,你将会领悟到 PHP 的 OOP 思想,以及 GD 库的使用,验证码生成。
1.1 涉及到的知识点
PHP
GD库
OOP编程
1.2 开发工具
sublime,一个方便快速的文本编辑器。点击桌面左下角: 应用程序菜单/开发/sublime
1.3 效果图
二、封装验证码类
2.1 建立目录以及准备字体
在 web 目录下建立一个 admin 目录作为我们的后台目录,存放后台代码文件。在 admin 下建立一个 fonts 目录,用于存放制作验证码所需字体。
在 admin 下新建一个 Captcha.php 文件,这就是我们需要编辑的验证码类文件。
当前目录层次结构:
编辑 Captcha.php 文件:
/**
* Captcha class
*/
class Captcha
{
function __construct()
{
# code...
}
}
添加该类的私有属性和构造方法:
/**
* Captcha class
*/
class Captcha
{
private $codeNum; //验证码位数
private $width; //验证码图片宽度
private $height; //验证码图片高度
private $img; //图像资源句柄
private $lineFlag; //是否生成干扰线条
private $piexFlag; //是否生成干扰点
private $fontSize; //字体大小
private $code; //验证码字符
private $string; //生成验证码的字符集
private $font; //字体
function __construct($codeNum = 4,$,$,$fontSize = 20,$lineFlag = true,$piexFlag = true)
{
$this->string = 'qwertyupmkjnhbgvfcdsxa123456789'; //去除一些相近的字符
$this->codeNum = $codeNum;
$this->height = $height;
$this->width = $width;
$this->lineFlag = $lineFlag;
$this->piexFlag = $piexFlag;
$this->font = dirname(__FILE__).'/fonts/consola.ttf';
$this->fontSize = $fontSize;
}
}
字体文件可通过以下命令下载到 fonts 目录:
$ wget http://labfile.oss.aliyuncs.com/courses/587/consola.ttf
接下来开始编写具体的方法:
创建图像资源句柄
//创建图像资源
public function createImage(){
$this->img = imagecreate($this->width, $this->height); //创建图像资源
imagecolorallocate($this->img,mt_rand(0,100),mt_rand(0,100),mt_rand(0,100)); //填充图像背景(使用浅色)
}
用到的相关函数
imagecreate:新建一个基于调色板的图像
imagecolorallocate:为一幅图像分配颜色
mt_rand:生成更好的随机数
创建验证码字符串并输出到图像
//创建验证码
public function createCode(){
$strlen = strlen($this->string)-1;
for ($i=0; $i < $this->codeNum; $i++) {
$this->code .= $this->string[mt_rand(0,$strlen)]; //从字符集中随机取出四个字符拼接
}
$_SESSION['code'] = $this->code; //加入 session 中
//计算每个字符间距
$diff = $this->width/$this->codeNum;
for ($i=0; $i < $this->codeNum; $i++) {
//为每个字符生成颜色(使用深色)
$txtColor = imagecolorallocate($this->img,mt_rand(100,255),mt_rand(100,255),mt_rand(100,255));
//写入图像
imagettftext($this->img, $this->fontSize, mt_rand(-30,30), $diff*$i+mt_rand(3,8), mt_rand(20,$this->height-10), $txtColor, $this->font, $this->code[$i]);
}
}
用到的相关函数:
imagettftext:用 TrueType 字体向图像写入文本
创建干扰线条
//创建干扰线条(默认四条)
public function createLines(){
for ($i=0; $i < 4; $i++) {
$color = imagecolorallocate($this->img,mt_rand(0,155),mt_rand(0,155),mt_rand(0,155)); //使用浅色
imageline($this->img,mt_rand(0,$this->width),mt_rand(0,$this->height),mt_rand(0,$this->width),mt_rand(0,$this->height),$color);
}
}
用到的相关函数:
imageline:画一条线段
创建干扰点
//创建干扰点 (默认一百个点)
public function createPiex(){
for ($i=0; $i < 100; $i++) {
$color = imagecolorallocate($this->img,mt_rand(0,255),mt_rand(0,255),mt_rand(0,255));
imagesetpixel($this->img,mt_rand(0,$this->width),mt_rand(0,$this->height),$color);
}
}
使用的相关函数:
imagesetpixel:画一个单一像素
对外输出图像:
public function show()
{
$this->createImage();
$this->createCode();
if ($this->lineFlag) { //是否创建干扰线条
$this->createLines();
}
if ($this->piexFlag) { //是否创建干扰点
$this->createPiex();
}
header('Content-type:image/png'); //请求页面的内容是png格式的图像
imagepng($this->img); //以png格式输出图像
imagedestroy($this->img); //清除图像资源,释放内存
}
用到的相关函数:
imagepng:以 PNG 格式将图像输出到浏览器或文件
imagedestroy:销毁一图像
对外提供验证码:
public function getCode(){
return $this->code;
}
完整代码如下:
/**
* Captcha class
*/
class Captcha
{
private $codeNum;
private $width;
private $height;
private $img;
private $lineFlag;
private $piexFlag;
private $fontSize;
private $code;
private $string;
private $font;
function __construct($codeNum = 4,$,$,$fontSize = 20,$lineFlag = true,$piexFlag = true)
{
$this->string = 'qwertyupmkjnhbgvfcdsxa123456789';
$this->codeNum = $codeNum;
$this->height = $height;
$this->width = $width;
$this->lineFlag = $lineFlag;
$this->piexFlag = $piexFlag;
$this->font = dirname(__FILE__).'/fonts/consola.ttf';
$this->fontSize = $fontSize;
}
public function createImage(){
$this->img = imagecreate($this->width, $this->height);
imagecolorallocate($this->img,mt_rand(0,100),mt_rand(0,100),mt_rand(0,100));
}
public function createCode(){
$strlen = strlen($this->string)-1;
for ($i=0; $i < $this->codeNum; $i++) {
$this->code .= $this->string[mt_rand(0,$strlen)];
}
$_SESSION['code'] = $this->code;
$diff = $this->width/$this->codeNum;
for ($i=0; $i < $this->codeNum; $i++) {
$txtColor = imagecolorallocate($this->img,mt_rand(100,255),mt_rand(100,255),mt_rand(100,255));
imagettftext($this->img, $this->fontSize, mt_rand(-30,30), $diff*$i+mt_rand(3,8), mt_rand(20,$this->height-10), $txtColor, $this->font, $this->code[$i]);
}
}
public function createLines(){
for ($i=0; $i < 4; $i++) {
$color = imagecolorallocate($this->img,mt_rand(0,155),mt_rand(0,155),mt_rand(0,155));
imageline($this->img,mt_rand(0,$this->width),mt_rand(0,$this->height),mt_rand(0,$this->width),mt_rand(0,$this->height),$color);
}
}
public function createPiexs(){
for ($i=0; $i < 100; $i++) {
$color = imagecolorallocate($this->img,mt_rand(0,255),mt_rand(0,255),mt_rand(0,255));
imagesetpixel($this->img,mt_rand(0,$this->width),mt_rand(0,$this->height),$color);
}
}
public function show()
{
$this->createImage();
$this->createCode();
if ($this->lineFlag) {
$this->createLines();
}
if ($this->piexFlag) {
$this->createPiexs();
}
header('Content-type:image/png');
imagepng($this->img);
imagedestroy($this->img);
}
public function getCode(){
return $this->code;
}
}
以上就是验证码类的全部代码。看起来确实挺简单的,不过用的图像处理函数比较多,上面相关的函数我也做了必要的链接和用途说明。这些函数也不用死记硬背,遇到不清楚的,随时查阅 PHP 官方文档,最重要的是还有中文文档。
2.2 使用验证码
既然已经封装完毕,那就可以开始使用了。这里为了方便,直接在 Captcha 类的下方调用该类:
session_start(); //开启session
$captcha = new Captcha(); //实例化验证码类(可自定义参数)
$captcha->show(); //调用输出
三、前端展示
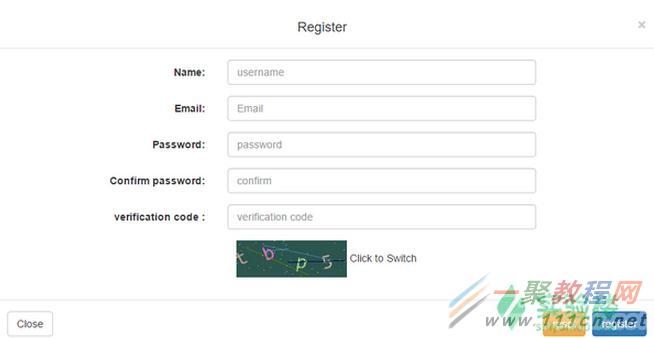
后端已经准备好了验证码,前端界面就可以展示了,修改 index.php 中的注册与登陆表单的验证码部分:
img 标签添加了点击事件的 js 代码,这样就可以实现点击更换验证码的功能!
效果图:
四、完善
-
上一个: Python学习笔记之函数用法
-
下一个: Laravel 5.3安装配置用户手册
相关文章
- PHP导出数据超时的优化建议解读 10-31
- PHP之mysql位运算解析 10-31
- Laravel实现登录跳转功能解析 10-31
- php双向队列解读 10-31
- Laravel异常上下文解决教程 10-24
- php数组查询元素位置方法介绍 10-24